

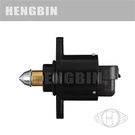
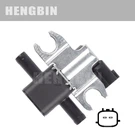

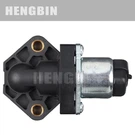

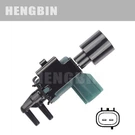
Hey there! As a supplier of carbon canister solenoid valves, I've seen my fair share of these little components. Today, I'm gonna share some tips on how to remove a carbon canister solenoid valve without damaging it. Whether you're a DIY mechanic or just looking to save some bucks on repairs, this guide is for you.
Why Remove the Carbon Canister Solenoid Valve?
Before we dive into the removal process, let's quickly talk about why you might need to remove the carbon canister solenoid valve. There are a few reasons:
- Maintenance: Over time, the valve can get clogged with dirt, debris, or carbon deposits. Removing it allows you to clean it and ensure it's working properly.
- Replacement: If the valve is faulty or damaged, you'll need to remove it and install a new one.
- Diagnosis: Sometimes, removing the valve can help you diagnose other issues in the fuel vapor system.
Tools You'll Need
To remove the carbon canister solenoid valve safely and without damage, you'll need the following tools:
- Socket set: You'll need a socket that fits the bolts or nuts holding the valve in place.
- Wrenches: A set of wrenches may also be necessary, depending on the type of fasteners used.
- Pliers: Pliers can be helpful for removing any clips or connectors.
- Screwdriver: A flathead or Phillips screwdriver may be needed to remove any screws or covers.
- Safety glasses: Protect your eyes from any debris that may fly up during the removal process.
- Gloves: Wear gloves to protect your hands from sharp edges and chemicals.
Step-by-Step Removal Process
Now that you have your tools ready, let's get started with the removal process. Here's a step-by-step guide:
Step 1: Locate the Carbon Canister Solenoid Valve
The carbon canister solenoid valve is usually located near the engine or the fuel tank. It's often attached to the carbon canister or the intake manifold. Refer to your vehicle's service manual or do a quick online search to find the exact location of the valve in your car.
Step 2: Disconnect the Battery
Before you start working on the valve, it's important to disconnect the battery to prevent any electrical shocks or short circuits. Locate the negative terminal on the battery and use a wrench to loosen the nut. Remove the negative cable from the terminal and set it aside.
Step 3: Remove Any Covers or Shields
Some vehicles may have covers or shields that need to be removed to access the carbon canister solenoid valve. Use a screwdriver or a socket set to remove any screws or bolts holding the covers in place. Carefully lift the covers off and set them aside.
Step 4: Disconnect the Electrical Connector
The carbon canister solenoid valve is connected to the vehicle's electrical system by an electrical connector. Locate the connector and use pliers or your fingers to gently pry it off the valve. Be careful not to damage the connector or the wires.
Step 5: Disconnect the Vacuum Hoses
The valve is also connected to the vehicle's vacuum system by one or more vacuum hoses. Locate the hoses and use pliers or your fingers to gently pull them off the valve. Pay attention to the position and orientation of the hoses so you can reinstall them correctly later.


Step 6: Remove the Mounting Bolts or Nuts
The carbon canister solenoid valve is usually held in place by one or more bolts or nuts. Use a socket set or a wrench to loosen and remove the bolts or nuts. Keep track of the bolts and nuts so you don't lose them.
Step 7: Remove the Valve
Once the mounting bolts or nuts are removed, carefully lift the carbon canister solenoid valve out of its mounting bracket. Be careful not to damage the valve or any surrounding components.
Step 8: Inspect the Valve
After removing the valve, take a close look at it to check for any signs of damage or wear. Look for cracks, leaks, or other issues. If the valve appears to be damaged, it's best to replace it with a new one.
Tips for Removing the Valve Without Damage
Here are some additional tips to help you remove the carbon canister solenoid valve without damaging it:
- Be gentle: When removing the electrical connector, vacuum hoses, and mounting bolts or nuts, be gentle and avoid using excessive force. This will help prevent damage to the valve and its components.
- Use the right tools: Make sure you're using the right tools for the job. Using the wrong tools can damage the valve or make the removal process more difficult.
- Take your time: Don't rush the removal process. Take your time to carefully disconnect the electrical connector, vacuum hoses, and mounting bolts or nuts. This will help ensure that you don't damage the valve or any surrounding components.
- Label the hoses and connectors: To make reinstallation easier, label the vacuum hoses and electrical connectors before you remove them. This will help you remember which hose or connector goes where.
Reinstallation
Once you've removed the carbon canister solenoid valve, you can either clean it or replace it with a new one. If you're cleaning the valve, follow the manufacturer's instructions for cleaning and reinstallation. If you're replacing the valve, make sure you choose a valve that's compatible with your vehicle.
To reinstall the valve, simply reverse the removal process. Connect the vacuum hoses and electrical connector, install the mounting bolts or nuts, and replace any covers or shields. Finally, reconnect the battery and start the engine to make sure the valve is working properly.
Our Carbon Canister Solenoid Valve Products
As a supplier of carbon canister solenoid valves, we offer a wide range of high-quality products that are suitable for various models of vehicles. Here are some of our popular products:
- Carbon Tank Solenoid Valve '0280142507 Suitable for Various Models Such As ford
- Carbon Tank Solenoid Valve 0280142553 Suitable for Various Models Such As Geely
- Canister Purge Valve13907618652 Is Suitable for All Models Such As BMW
Our valves are made from high-quality materials and are designed to meet or exceed OEM specifications. They're built to last and provide reliable performance. If you're in the market for a new carbon canister solenoid valve, we'd love to hear from you.
Contact Us for Procurement
If you're interested in purchasing our carbon canister solenoid valves or have any questions about our products, please don't hesitate to contact us. We're here to help you find the right valve for your vehicle and provide you with the best possible service.
References
- Haynes Repair Manual for your specific vehicle model
- Manufacturer's instructions for the carbon canister solenoid valve