

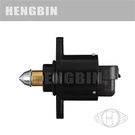

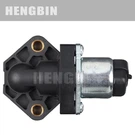

Hey there, fellow car enthusiasts! As a supplier of idle air control valves, I've seen firsthand how these little components can make a big difference in your vehicle's performance. Today, I'm gonna walk you through the process of removing an idle air control valve. Whether you're a DIY mechanic looking to save some cash or just curious about how your car works, this guide is for you.
Why Remove the Idle Air Control Valve?
Before we dive into the removal process, let's talk about why you might want to remove your idle air control valve in the first place. The idle air control valve, or IACV for short, is responsible for regulating the amount of air that bypasses the throttle plate when your engine is idling. Over time, carbon deposits, dirt, and grime can build up on the valve, causing it to stick or malfunction. This can lead to a variety of problems, including rough idling, stalling, and poor fuel economy.
Removing the IACV allows you to clean or replace it, restoring proper engine idle and performance. It's also a good idea to remove the valve if you're experiencing any of the symptoms mentioned above, as it could be a sign of a more serious underlying issue.
Tools You'll Need
Before you start removing the idle air control valve, you'll need to gather a few tools. Here's what you'll need:
- Socket set
- Wrench set
- Screwdriver set
- Pliers
- Clean rag
- Carburetor cleaner
- Safety goggles
- Gloves
Step-by-Step Guide to Removing the Idle Air Control Valve
Now that you have your tools ready, let's get started on removing the idle air control valve. The process may vary slightly depending on your vehicle make and model, but the general steps are the same.
Step 1: Prepare Your Vehicle
Before you start working on your vehicle, it's important to take a few safety precautions. Make sure your engine is cool and turned off, and disconnect the negative battery cable to prevent any electrical shocks. You should also wear safety goggles and gloves to protect yourself from any chemicals or debris.
Step 2: Locate the Idle Air Control Valve
The idle air control valve is usually located on or near the throttle body. It's a small, cylindrical component with an electrical connector attached to it. Refer to your vehicle's service manual or online resources to find the exact location of the IACV on your vehicle.
Step 3: Disconnect the Electrical Connector
Once you've located the IACV, use a pair of pliers or a small flathead screwdriver to disconnect the electrical connector from the valve. Be careful not to damage the connector or the wires.
Step 4: Remove the Mounting Bolts
Next, use a socket or wrench to remove the mounting bolts that hold the IACV in place. The number of bolts may vary depending on your vehicle, but most IACVs are held in place by two or three bolts. Keep the bolts in a safe place so you don't lose them.
Step 5: Remove the Idle Air Control Valve
Once you've removed the mounting bolts, gently pull the IACV away from the throttle body. Be careful not to damage the valve or the throttle body. If the valve is stuck, you may need to use a small amount of penetrating oil to loosen it.
Step 6: Clean the Idle Air Control Valve
Now that you've removed the IACV, it's time to clean it. Use a clean rag and some carburetor cleaner to remove any carbon deposits, dirt, or grime from the valve. Make sure to clean the valve thoroughly, including the inside of the valve and the throttle body opening.
Step 7: Inspect the Idle Air Control Valve
After cleaning the IACV, inspect it for any signs of damage or wear. Look for cracks, leaks, or other signs of damage that could affect the valve's performance. If you notice any damage, you may need to replace the valve.


Step 8: Reinstall the Idle Air Control Valve
Once you've cleaned and inspected the IACV, it's time to reinstall it. Carefully align the valve with the throttle body opening and insert the mounting bolts. Tighten the bolts securely, but be careful not to over-tighten them.
Step 9: Reconnect the Electrical Connector
Finally, reconnect the electrical connector to the IACV. Make sure the connector is securely attached and there are no loose wires.
Tips and Tricks
- If you're having trouble removing the IACV, try using a small amount of penetrating oil to loosen it.
- When cleaning the IACV, make sure to use a clean rag and some carburetor cleaner. Avoid using abrasive materials or harsh chemicals, as they can damage the valve.
- If you're not comfortable removing the IACV yourself, it's best to take your vehicle to a professional mechanic. They have the tools and expertise to safely remove and replace the valve.
Related Products
If you're in the market for a new idle air control valve, we've got you covered. Check out these products:
- Manually adjust the idle air control valve stepper motor 60304 90685
- Idle Motor 17113188 Is Suitable for Various Automotive Models Such As Buick
- Idle Air Control Valve Stepper Motor B20/01 84020 958060 7514020 46451794 F00099M001 SXBF01B2 SXBF03A2
Conclusion
Removing an idle air control valve is a relatively simple process that can be done with a few basic tools. By following the steps outlined in this guide, you can clean or replace your IACV and restore proper engine idle and performance. If you have any questions or need further assistance, don't hesitate to contact us. We're here to help you keep your vehicle running smoothly.
If you're interested in purchasing an idle air control valve or have any questions about our products, feel free to reach out to us. We're always happy to assist with your procurement needs and discuss how our high - quality idle air control valves can benefit your vehicles.
References
- Haynes Repair Manuals
- Chilton Automotive Repair Manuals
- Vehicle manufacturer's service manuals