



Hey there! I'm a supplier of cooling shutoff valves, and I get asked a lot about how to install these nifty little devices. So, I thought I'd put together this blog post to walk you through the process step by step.
Why You Need a Cooling Shutoff Valve
First off, let's talk about why you'd even want to install a cooling shutoff valve. These valves are super important in a bunch of different systems, especially in vehicles and industrial machinery. They help control the flow of coolant, which is crucial for keeping things from overheating. If your engine or equipment gets too hot, it can cause some serious damage, and that's where a cooling shutoff valve comes in handy. It allows you to stop the coolant flow when needed, like during maintenance or in case of an emergency.

What You'll Need
Before you start the installation, you'll need to gather a few tools and materials. Here's a quick list:
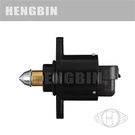
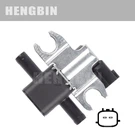
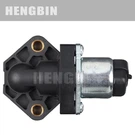
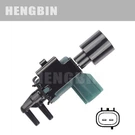
- Cooling shutoff valve: Of course, you'll need the valve itself. Make sure you get the right one for your system. You can check out our Cooling Shut - Off Valve 0005061000 Is Applicable To Benz if you're looking for a valve for your Benz.
- Wrenches: You'll need a set of wrenches to loosen and tighten the fittings. The size will depend on the type of valve and the pipes you're working with.
- Sealant: A good quality sealant is essential to prevent leaks. You can find this at any hardware store.
- Safety glasses and gloves: Safety first! These will protect your eyes and hands from any coolant spills or sharp edges.
Step 1: Prepare Your Workspace
The first thing you need to do is prepare your workspace. Make sure the area is clean and well - lit. If you're working on a vehicle, park it on a level surface and let the engine cool down completely. If it's industrial equipment, shut off the power and follow all the necessary safety procedures.
Step 2: Locate the Installation Point
Next, you need to find the right place to install the cooling shutoff valve. This will depend on your system. In a vehicle, it's usually installed in the coolant line near the radiator or the engine. In industrial machinery, it might be in a specific part of the cooling system. Look for a section of the pipe where you can easily access and install the valve without interfering with other components.
Step 3: Drain the Coolant
Before you start cutting or installing the valve, you need to drain the coolant from the system. Place a drain pan under the drain plug or the lowest point of the coolant line. Open the drain plug and let the coolant drain out completely. Be careful, as the coolant can be hot and toxic.
Step 4: Cut the Pipe
Once the coolant is drained, you'll need to cut the pipe at the installation point. Use a pipe cutter or a hacksaw to make a clean cut. Make sure the cut is straight and smooth, as this will make it easier to install the valve.
Step 5: Install the Valve
Now it's time to install the valve. Apply a thin layer of sealant to the threads of the valve and the pipe fittings. Then, carefully thread the valve onto the pipe. Use the wrenches to tighten the fittings, but don't over - tighten them, as this can damage the threads.
Step 6: Reconnect the Coolant Line
After the valve is installed, reconnect the rest of the coolant line. Make sure all the connections are tight and secure. You may need to use additional fittings or adapters depending on your system.
Step 7: Refill the Coolant
Once everything is connected, it's time to refill the coolant. Use the recommended type of coolant for your system and fill it to the appropriate level. Check for any leaks around the valve and the connections. If you see any leaks, tighten the fittings or apply more sealant.
Step 8: Test the System
Finally, test the system to make sure the valve is working properly. Start the engine or turn on the industrial equipment and let it run for a few minutes. Check the temperature gauge to make sure the coolant is flowing and the system is cooling properly. You can also operate the valve to see if it can effectively shut off the coolant flow.
Troubleshooting
If you run into any problems during the installation or testing, here are a few things to check:
- Leaks: If you have a leak, check the fittings to make sure they're tight. You may need to apply more sealant or replace a damaged gasket.
- Valve not working: If the valve doesn't open or close properly, check the actuator or the control mechanism. Make sure it's connected correctly and there are no blockages.
- Coolant not flowing: If the coolant isn't flowing, check for any blockages in the pipes or the valve. You may need to clean the system or replace a clogged filter.
Conclusion
Installing a cooling shutoff valve isn't too difficult if you follow these steps. It's a great way to improve the safety and efficiency of your cooling system. If you have any questions or need more information about our cooling shutoff valves, don't hesitate to reach out. We're here to help you with all your cooling valve needs. Whether you're a DIY enthusiast or a professional mechanic, we've got the right valve for your system. So, if you're in the market for a cooling shutoff valve, give us a shout, and let's start a conversation about your requirements.
References
- General automotive repair manuals
- Industrial equipment maintenance guides