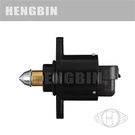

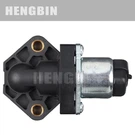

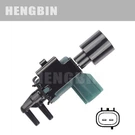
When it comes to maintaining your Honda vehicle, one crucial component that might need attention is the EGR (Exhaust Gas Recirculation) vacuum solenoid valve. The EGR system helps reduce nitrogen oxide emissions by recirculating a portion of the exhaust gases back into the engine cylinders. Over time, the EGR vacuum solenoid valve can malfunction, leading to the illumination of the check - engine light. As a trusted supplier of EGR vacuum solenoid valves for Honda, I'm here to guide you through the steps to reset the check - engine light after replacing this important part.
Step 1: Confirm the Replacement of the EGR Vacuum Solenoid Valve
Before attempting to reset the check - engine light, it's essential to ensure that the EGR vacuum solenoid valve has been correctly replaced. As a supplier, we offer high - quality EGR vacuum solenoid valves specifically designed for Honda models. For example, our valves are engineered to meet or exceed OEM (Original Equipment Manufacturer) standards, ensuring optimal performance and compatibility.
First, make sure that the new valve is the correct part for your Honda. Check the part number and cross - reference it with your vehicle's specifications. Once you've confirmed the correct part, carefully install the new EGR vacuum solenoid valve. Follow the manufacturer's instructions, which usually involve disconnecting the electrical connector, removing the old valve, and installing the new one in its place. Tighten all the bolts securely to prevent any leaks.
Step 2: Inspect the EGR System and Associated Components
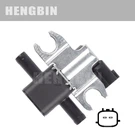
After replacing the EGR vacuum solenoid valve, it's a good idea to inspect the entire EGR system and its associated components. Look for any signs of damage, such as cracked hoses, loose connections, or clogged passages. A damaged or clogged component can still cause the check - engine light to stay on, even after replacing the valve.


Check the vacuum hoses connected to the EGR vacuum solenoid valve. Ensure that they are properly seated and not kinked or damaged. If you find any issues with the hoses, replace them with new ones. Also, inspect the EGR valve itself. A faulty EGR valve can lead to improper exhaust gas recirculation and trigger the check - engine light.
Step 3: Clear the Fault Codes Using an OBD - II Scanner
The most common and reliable way to reset the check - engine light is by using an OBD - II (On - Board Diagnostic) scanner. These scanners are widely available in automotive stores or can be borrowed from some auto parts retailers. As a supplier, we recommend investing in a good - quality OBD - II scanner for regular vehicle maintenance.
To use the OBD - II scanner:
- Locate the OBD - II port in your Honda. In most Honda vehicles, the OBD - II port is located under the dashboard, near the steering column.
- Plug the OBD - II scanner into the port. The scanner will power on automatically.
- Follow the scanner's instructions to enter the vehicle's make, model, and year.
- Select the option to read the fault codes. The scanner will communicate with your vehicle's computer and retrieve any stored fault codes.
- After reading the codes, select the option to clear the codes. This will erase the fault codes from the vehicle's memory and turn off the check - engine light.
Step 4: Perform a Test Drive
After clearing the fault codes, take your Honda for a test drive. This allows the vehicle's computer to re - evaluate the performance of the EGR system and other components. During the test drive, pay attention to how the vehicle runs. Notice if there are any unusual noises, vibrations, or changes in performance.
If the check - engine light comes back on during or after the test drive, it indicates that there may still be an issue with the EGR system or another component. In this case, you may need to repeat the inspection process or seek professional help.
Step 5: Monitor the Check - Engine Light
For the next few days, keep an eye on the check - engine light. If it remains off, it's a good sign that the replacement of the EGR vacuum solenoid valve and the reset process were successful. However, if the light comes back on, it could mean that there is a more complex problem that requires further diagnosis.
As a supplier, we understand that maintaining your vehicle's EGR system is crucial for its performance and emissions control. That's why we offer a wide range of EGR vacuum solenoid valves suitable for various automotive models. For instance, you can check out our EGR Vacuum Solenoid Valve MR577099 Suitable for Various Automotive Models Such As Mitsubishi, EGR Vacuum Solenoid Valve 90910 - 12262 Suitable for Various Automotive Models Such As Toyota, and EGR Vacuum Solenoid Valve PV619 2M1253 Suitable for Various Models Such As Lexus.
If you're in the market for a high - quality EGR vacuum solenoid valve for your Honda or other vehicles, we're here to assist you. Our team of experts can provide you with detailed product information and help you choose the right part for your needs. We're committed to providing excellent customer service and ensuring that you get the best value for your money. Whether you're a professional mechanic or a DIY enthusiast, we have the parts you need to keep your vehicle running smoothly. Don't hesitate to contact us for any procurement inquiries or to discuss your specific requirements.
References
- Haynes Repair Manuals for Honda Vehicles
- Honda Owner's Manuals
- OBD - II Scanner User Guides